Build a website chatbot
Crawl your website, train a chatbot on it, and embed a public assistant in minutes.
A website chatbot answers visitor questions using the content already on your site, then lives as an embedded widget on every page. This guide takes you from zero to a live, public assistant.
Before you start
- Create an account at denser.ai.
- Have your website URL ready (a domain, a specific URL, or a sitemap link).
1. Create the chatbot and add your website
Sign in to denser.ai and select Create Chatbot.
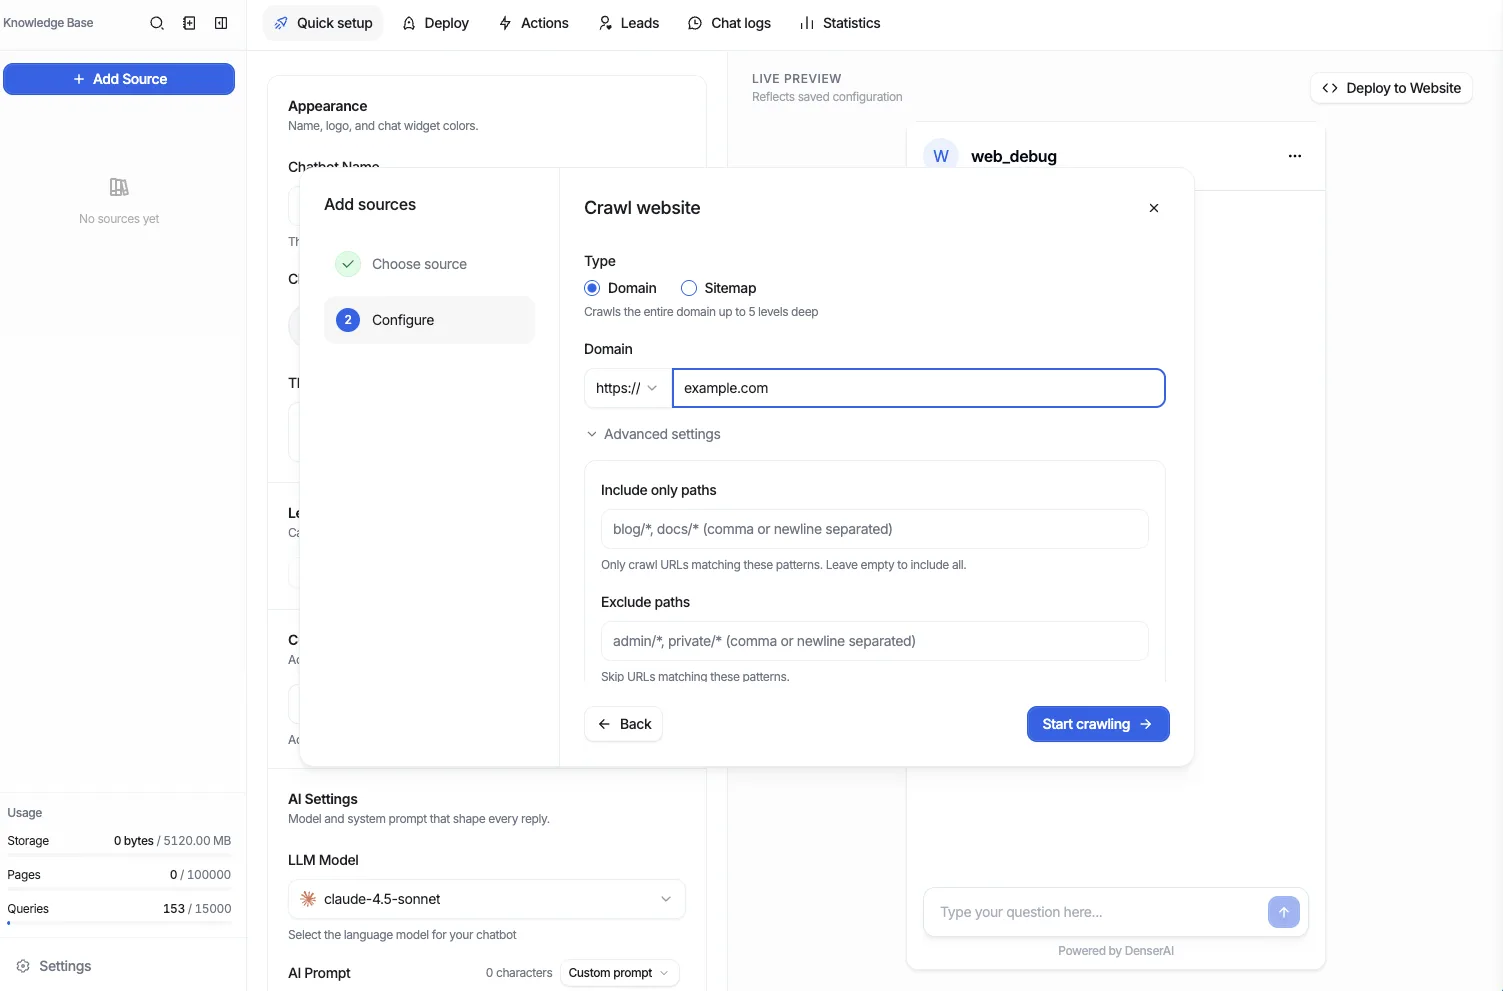
Choose the Website source tab, then enter your URL. You can crawl an entire domain, a single page, or a sitemap.
Optionally set include and exclude path rules to control which pages get crawled, then start the crawl.
Wait for crawling to finish. Each discovered link shows a status (Crawling → Ready, or Failed). You can re-crawl individual links or all links at any time.
Click Create Chatbot to index the crawled pages and build your assistant.
For crawl options in depth, see Data Store → Website.
2. Test your answers
Ask a few questions a real visitor would ask. Click the citation on each reply to confirm it points to the right page. If an answer is weak, add the missing page or refine your sources, then re-index.
3. Customize the widget
Match the assistant to your brand before it goes live:
- Appearance — colors, theme, avatar, and watermark
- Messages & prompts — welcome message, suggested questions, and persona
- Model & citations — model version and citation display
4. Capture leads (optional)
Turn conversations into pipeline. Enable Leads to collect a visitor's name, email, or custom fields mid-chat and sync them to Google Sheets, a webhook, or email.
5. Publish and embed
Open the Security → Visibility settings and set the chatbot to Public.
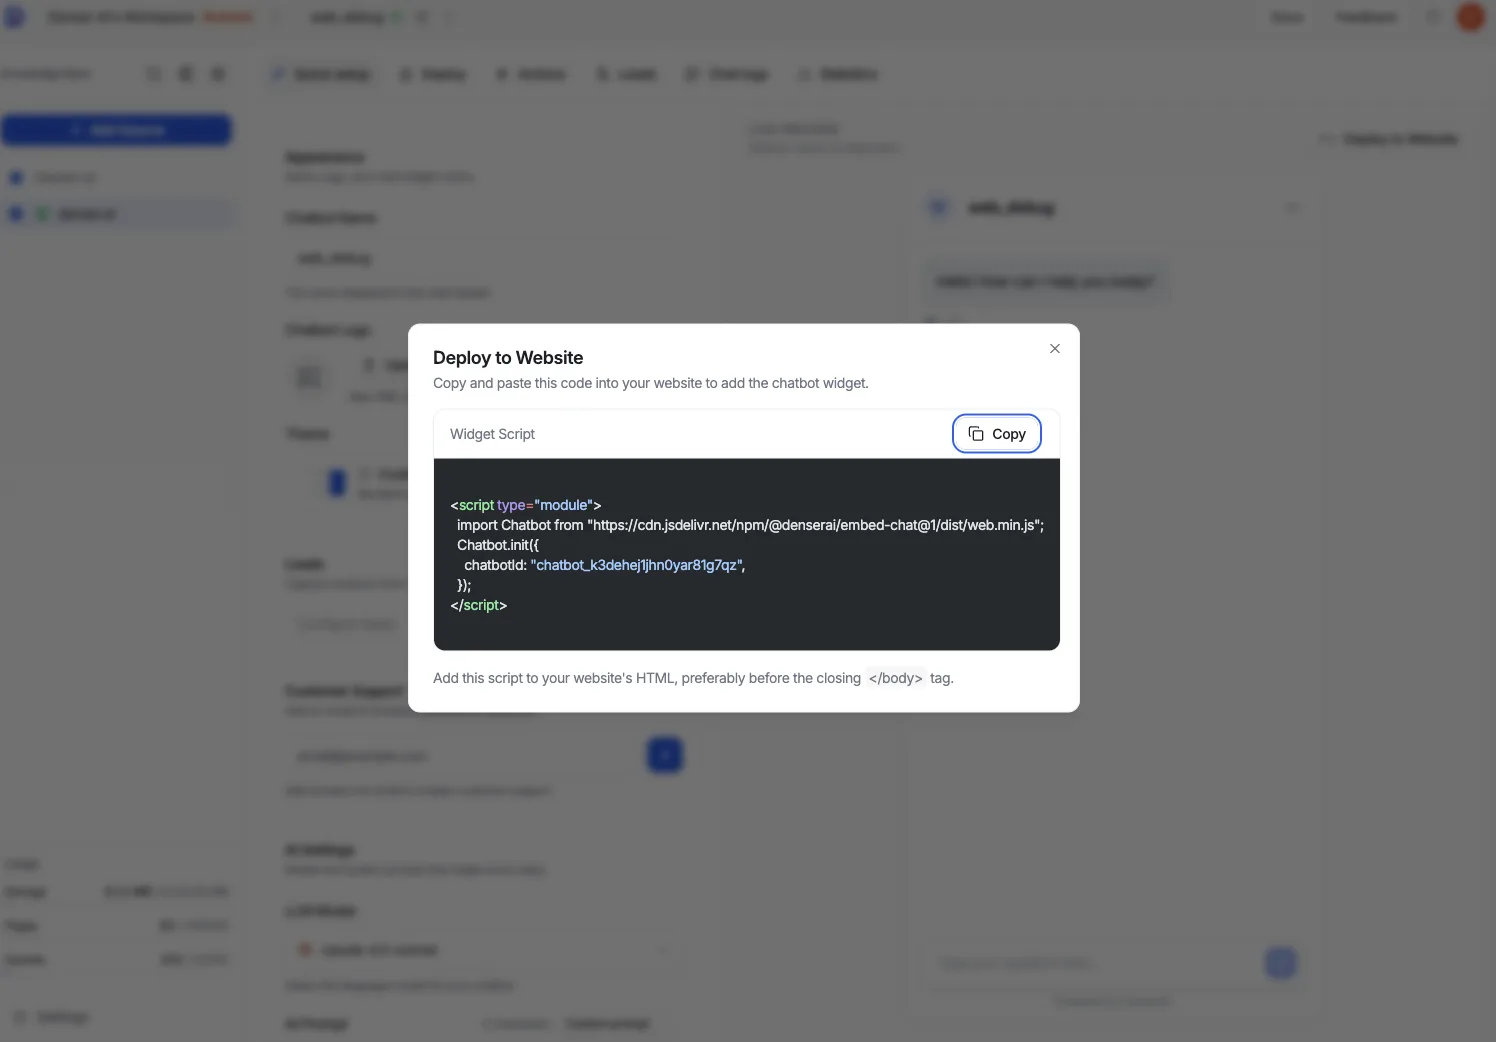
Go to the Deploy section and open the Website Embed card.
Copy the embed snippet and paste it into your site's HTML or tag manager.
Using a platform? See the dedicated guides for WordPress and Shopify.