
Team Management
Manage team roles and permissions in Denser.ai. Invite members, control access, and organize workspaces to keep projects secure and collaboration smooth.
Team management lets the workspace owner manage members and their access. With it you can:
- Manage roles -- define access levels for team members (admin or regular chatbot users).
- Create custom roles -- restrict members to a specific subset of chatbots.
- Manage members -- invite people to the workspace and assign them roles.
Open Team Management
From the workspace sidebar, click Settings. You'll see tabs for Roles and Members, plus current seat usage.
Built-in roles
Denser has three built-in roles with predefined access levels:
- Owner -- full access to the Denser account. Each Denser user is the owner of their own account and workspace. There is exactly one owner per workspace, and you cannot add additional owners.
- Admin -- access to most administrative operations, except critical owner operations such as payment and deleting the account. Owners can delegate chatbot creation and lifecycle management to admins.
- Member -- access to the chat window only, for all chatbots in the workspace.
These roles apply to every chatbot in the workspace. To restrict access to a subset of chatbots, create a custom role as described below.
Custom roles
Custom roles give fine-grained access control to a subset of chatbots. For example, suppose you have one chatbot with restricted information and another that everyone can use. Assign a built-in role to privileged members who need access to all chatbots, and create a custom role for regular members that only allows access to the non-restricted chatbot.
On the Denser dashboard, go to the Roles section in the side panel.
Click + Add Role to start creating a new role.
In the dialog, enter a name and description for the role.
Open the Chatbot Accesses dropdown and select the chatbots this role can access.
Click Add. The role appears in the list and can be assigned during invitations.
You assign built-in and custom roles the same way--when you invite members, as described below.
Members
Once you've decided which roles your team needs, switch to the Members tab in the side panel to add people to your workspace.
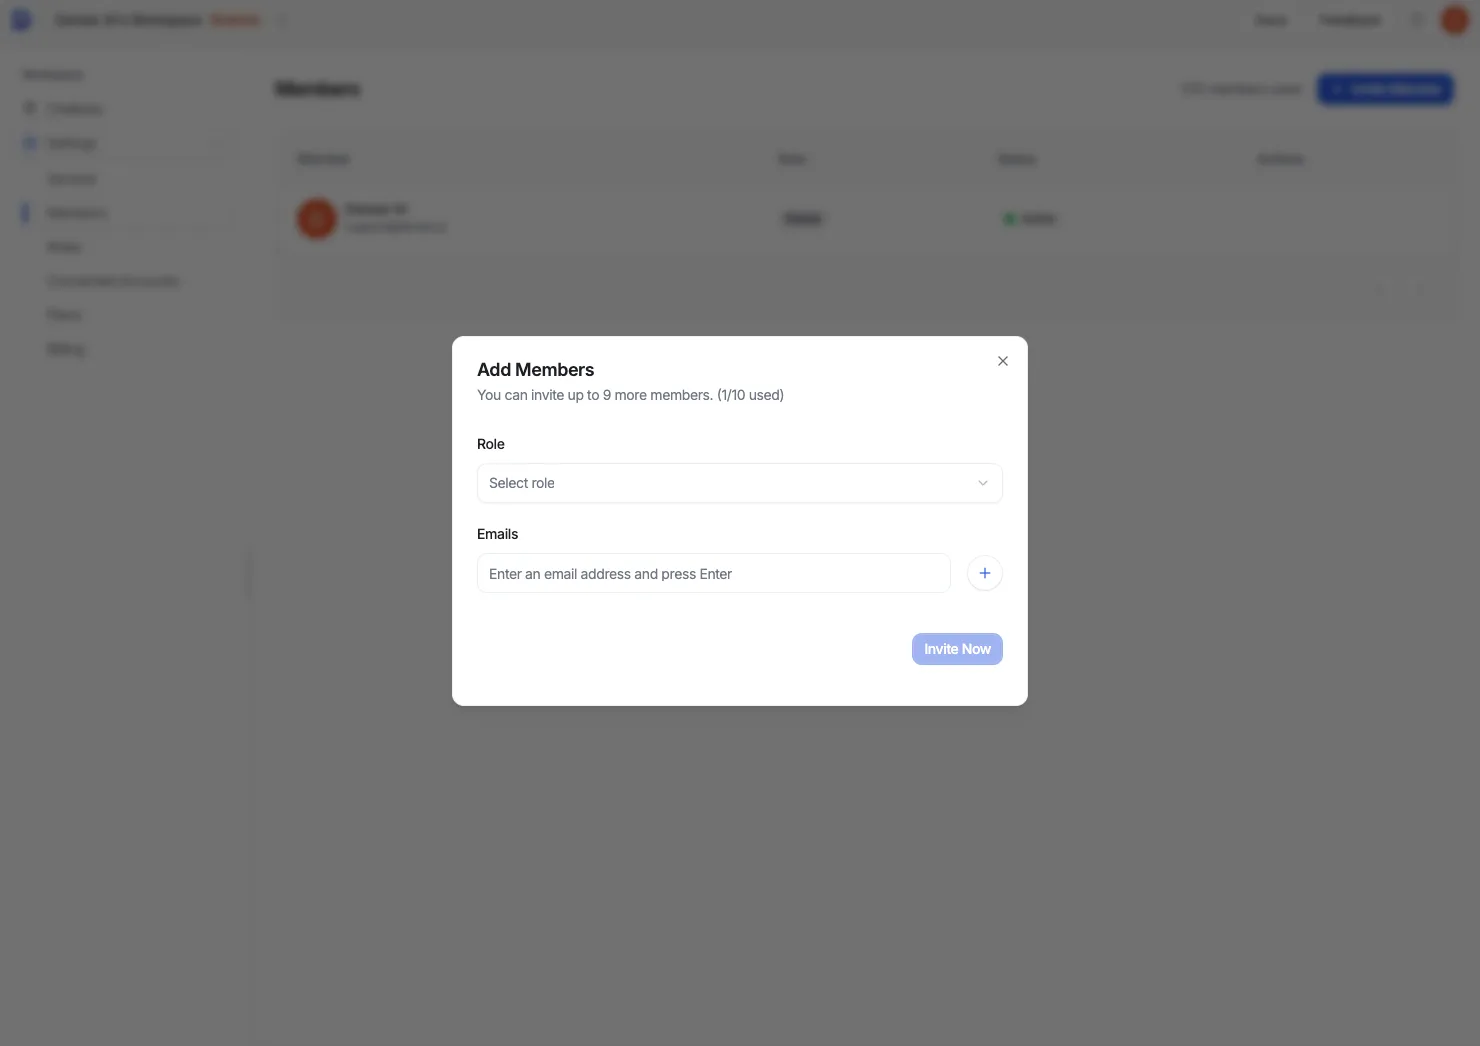
Click + Invite Member to start an invitation.
In the dialog, select a role for the new members. Both built-in and custom roles appear in the dropdown.
Enter the email addresses of the people you want to invite. To batch invite, add multiple emails: press Enter or click the + button after each address.
Click Invite Now to confirm. Denser sends a separate invitation email to each person, and they appear in the Members table.
Member view
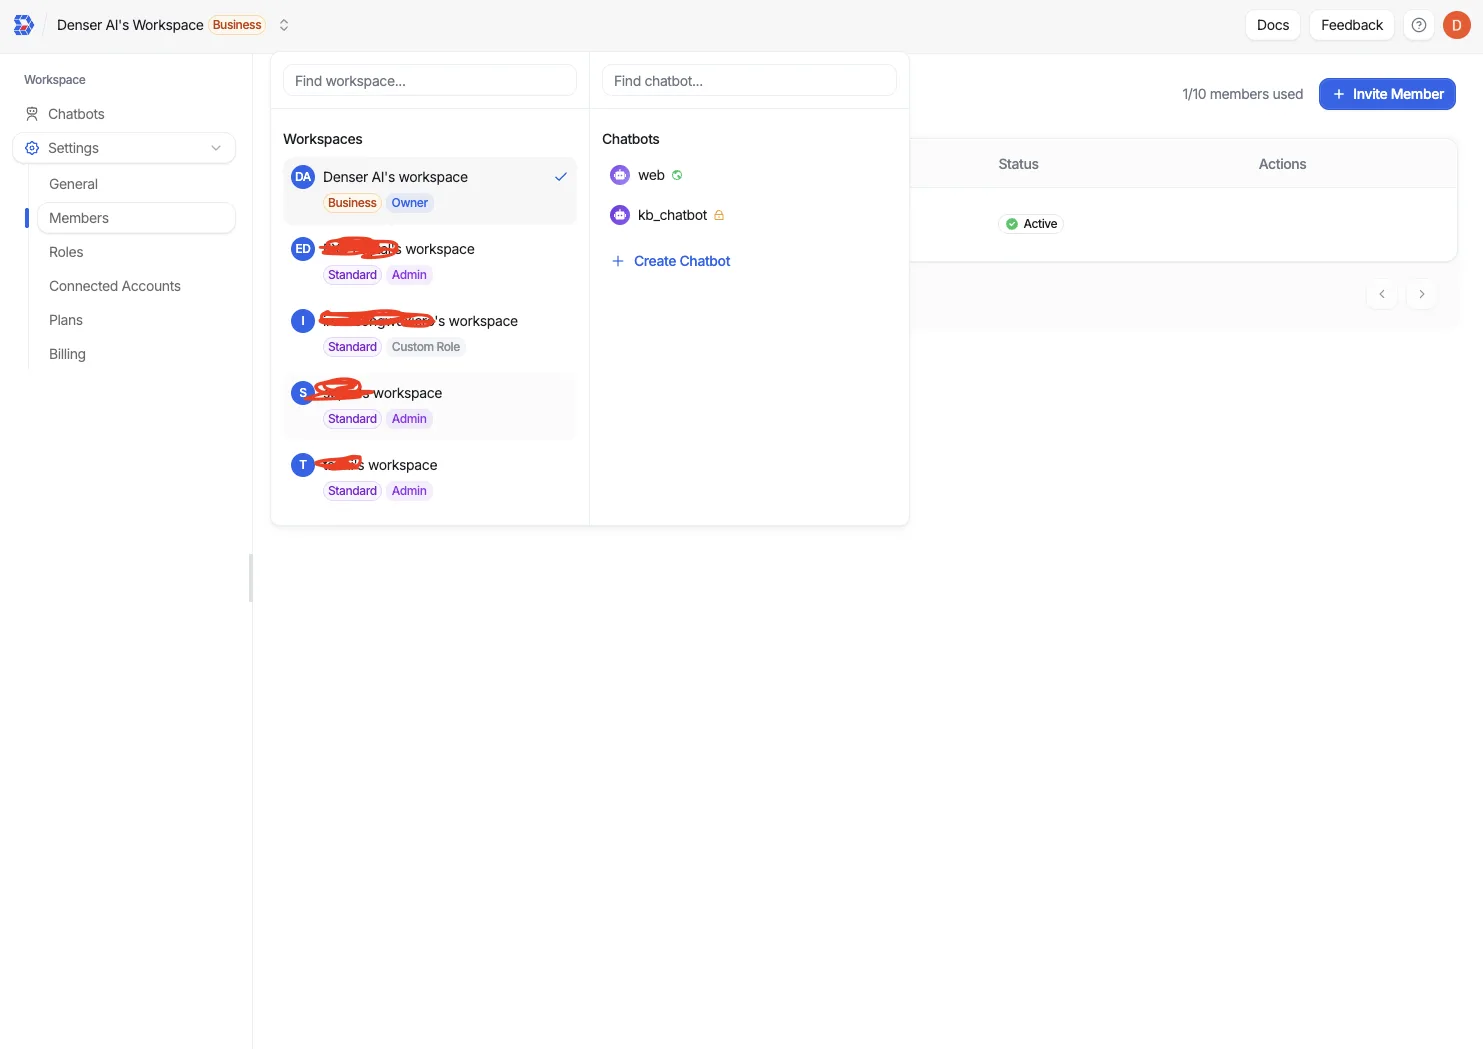
After an invited member signs up and logs in, the workspace switcher lists every workspace they belong to. Their own workspace shows the Owner role, alongside any workspaces they were invited to — each labeled with its plan and the role they were granted there, such as Admin or a Custom Role. Selecting a workspace shows the chatbots they can access in it.
Workspace team size
The maximum number of workspace members is set by your Denser subscription plan, as shown below.
If you need more, purchase Team Member Seat add-ons to raise the limit. See Plans and Billing for details.
| Plan | Included members | Details |
|---|---|---|
| Free Trial | 1 | Owner only |
| Starter | 1 | Owner only |
| Standard | 5 | Owner plus 4 members |
| Business | 10 | Owner plus 9 members |
Need more seats?
Purchase Team Member Seat add-ons from the billing page at any time. See Plans and Billing