How to Add a Chatbot to Your Website: Step-by-Step for Every Platform (2026)

Adding a chatbot to your website is one of the fastest ways to improve customer support, capture leads, and reduce the workload on your team. The problem is that most guides make it sound more complicated than it actually is.
Whether you run a WordPress blog, a Shopify store, or a custom-coded site, the process follows the same pattern: pick a platform, train it on your content, copy a code snippet, and paste it into your site. The whole thing takes under 10 minutes with the right tool.
This guide walks through every step for every major platform. If you want to compare chatbot platforms first, see our best website chatbot comparison.
What Is Chatbot Integration?#
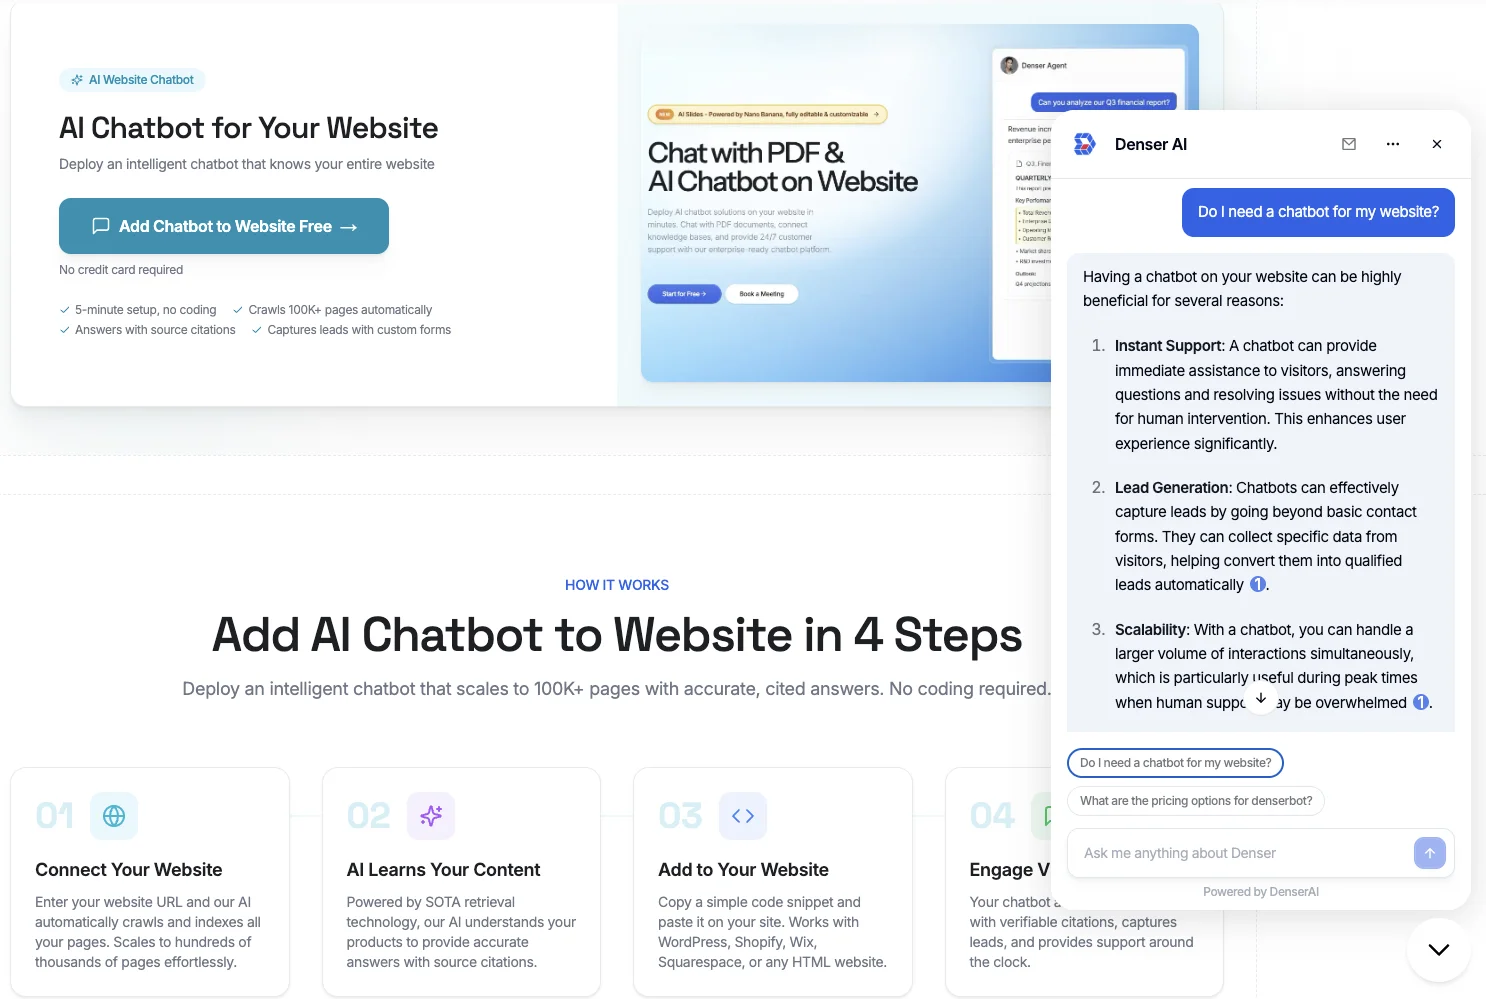
Chatbot integration is the process of embedding an AI-powered chat interface into your website so visitors can interact with it directly. The chatbot connects to a knowledge base (your website content, documents, or FAQs) and responds to visitor questions in real time.
Modern AI chatbots use retrieval-augmented generation (RAG) to pull accurate answers from your actual content instead of generating responses from scratch. This means every answer is grounded in your data, and many platforms include source citations so visitors can verify the information.
For a deeper look at how AI chatbots work, see our guide on AI chatbot for website.
Three Ways to Add a Chatbot: Which Is Right for You?#
There are three main integration methods. Each has trade-offs depending on your technical skills, customization needs, and budget.
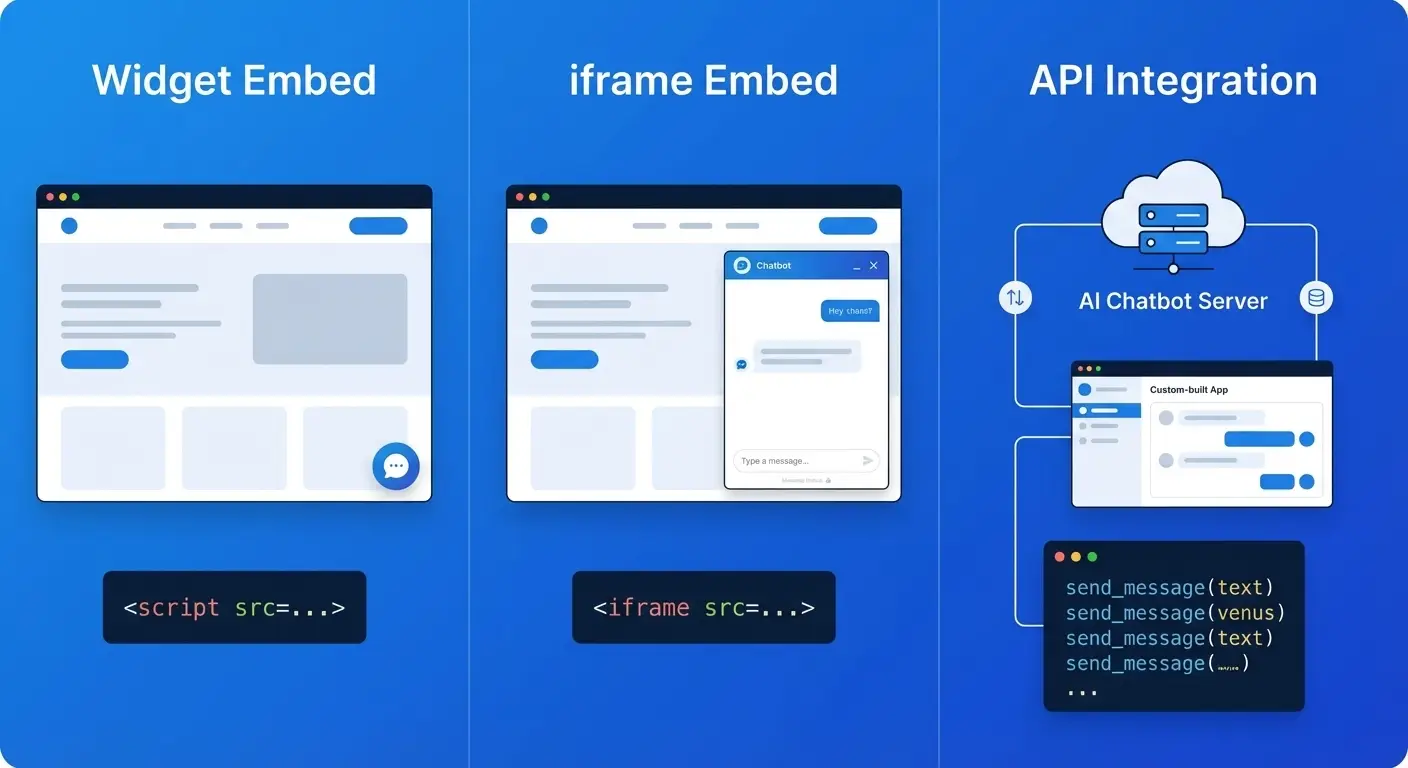
1. Widget Embed (Recommended for Most Businesses)#
A widget embed adds a floating chat button to the bottom-right corner of your site. You copy a JavaScript snippet and paste it before the closing </body> tag. The widget loads asynchronously, so it does not block your page from rendering.
Best for: Non-technical users, small businesses, anyone who wants a working chatbot in under 10 minutes.
Pros: No coding required, works on any platform, minimal page speed impact, easy to customize appearance.
Cons: Limited layout control (always a floating button), depends on the provider's uptime.
2. Iframe Embed#
An iframe embeds the chatbot as a fixed element within your page layout. Instead of a floating button, the chat appears inline wherever you place it, such as inside a support page or contact section.
Best for: Businesses that want the chatbot visible in a specific location rather than as a floating widget.
Pros: Full control over placement and sizing, works well on dedicated support pages, no popup behavior.
Cons: Less flexible than a widget for site-wide deployment, requires adjusting width and height for responsive design.
3. API Integration (Developer Required)#
API integration gives you complete control. You send user messages to the chatbot's API endpoint and handle the responses in your own frontend. This is useful when you need the chatbot inside a custom dashboard, mobile app, or workflow.
Best for: Development teams building custom interfaces or integrating chatbot responses into existing applications.
Pros: Full customization, works in any environment (web, mobile, internal tools), no UI constraints.
Cons: Requires a developer, more setup time, you handle the UI and error states.
If you are not sure which method to use, start with the widget embed. You can always switch later. For businesses that want to build without coding, our no-code chatbot guide covers the full process.
How to Add a Chatbot to Your Website With Denser.ai#
Here is the step-by-step process using Denser.ai, which supports all three integration methods above.
Step 1: Create Your Chatbot#
- Visit denser.ai and click "Get Started Free"
- Sign up with your email or Google account
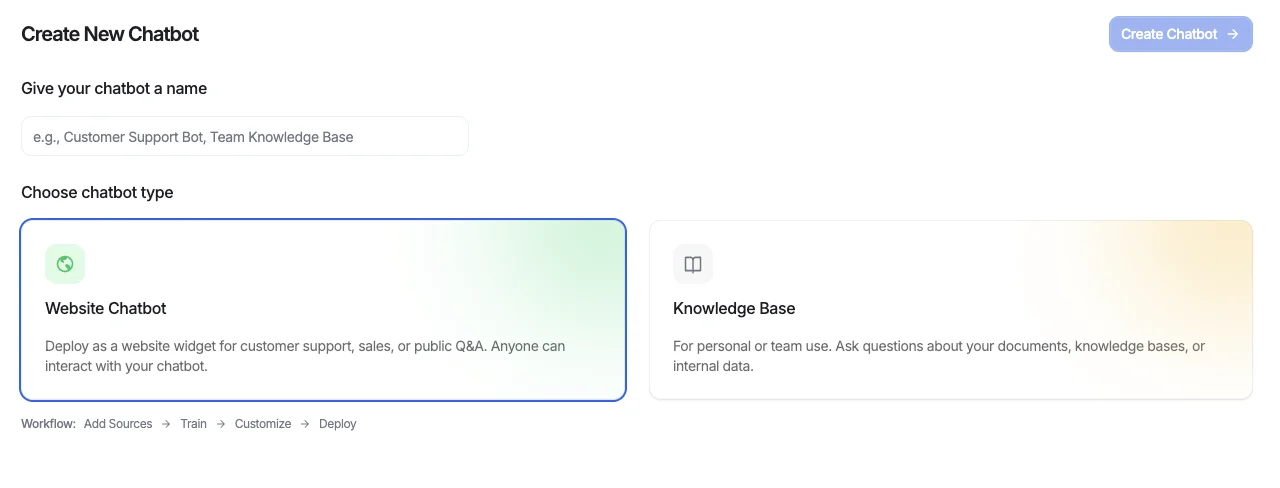
- From the dashboard, click "New chatbot"
- Name your chatbot and select Website Chatbot
Step 2: Train It on Your Content#
Your chatbot is only as good as the knowledge behind it. Add your content using one of these methods:
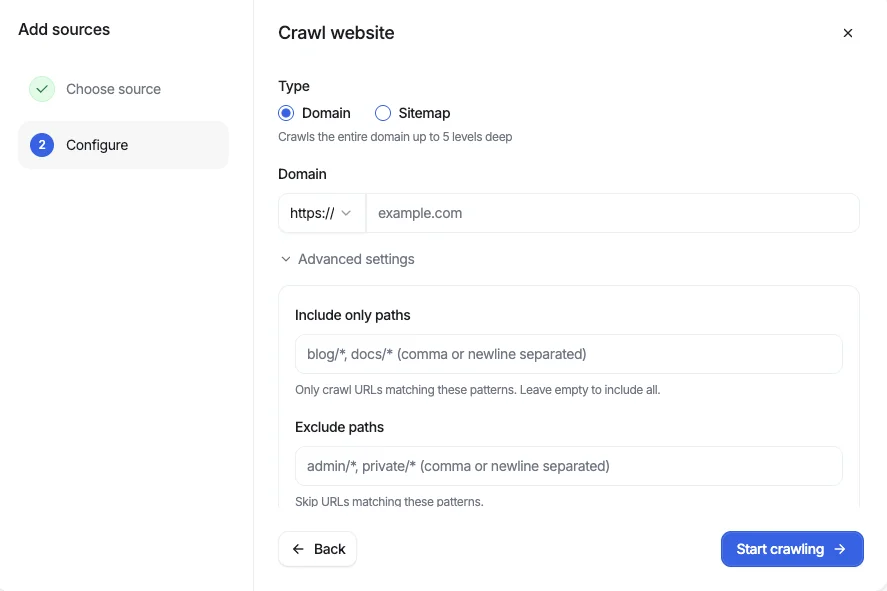
- Website crawl: Enter your URL and choose Domain (full site) or Sitemap (XML sitemap). Click Start crawling to index all pages automatically.
- Document upload: Upload PDFs, DOCX, XLSX, or other files directly.
- Q&A pairs: Add specific question-answer pairs for precise responses.
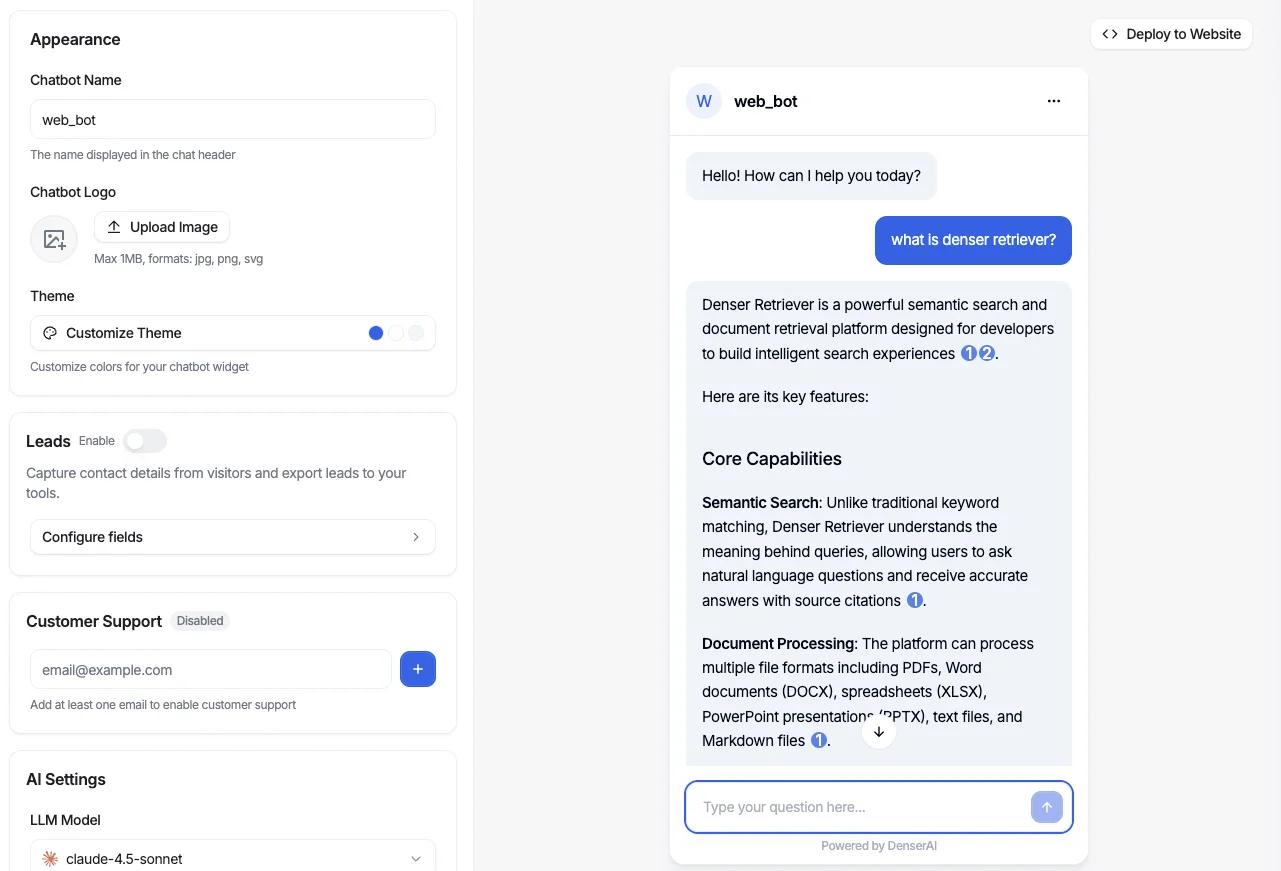
Step 3: Customize the Appearance#
Open the Appearance panel to match the chatbot to your brand:
- Theme: Light or Dark mode, or custom colors
- Logo: Upload your brand icon
- Leads: Enable a contact form to capture visitor details
- AI Settings: Choose your LLM model and toggle source citations
Step 4: Deploy on Your Website#
Go to the Deploy tab. For a floating widget (the most common option), copy this snippet:
<script type="module">
  import Chatbot from "https://cdn.jsdelivr.net/npm/@denserai/embed-chat@1/dist/web.min.js";
  Chatbot.init({
    chatbotId: "your_chatbot_id",
  });
</script>
Paste this before the closing </body> tag of your website. The sections below cover exactly how to do this on each platform.
Step 5: Test and Monitor#
After deployment, test with real customer questions. Check the Chat Logs to review conversations and correct answers directly. The chatbot uses your corrections for similar queries going forward.
Track usage through the Statistics dashboard: total chats, user counts, and resolution rates. Re-crawl your website or add new content at any time without rebuilding.
Start building for free or schedule a demo.
Platform-Specific Installation Guides#
WordPress#
Method 1: Plugin (Easiest)
- In your WordPress dashboard, go to Plugins > Add New
- Search for "Denser" and click Install Now, then Activate
- Go to Settings > Denser Chat
- Enter your Chatbot ID and set access to Public
- Choose which pages display the widget: all pages, homepage only, or specific page IDs
- Save your settings
The plugin handles the embed code automatically. No theme editing required.
Method 2: Manual Code
If you prefer not to use a plugin, go to Appearance > Theme File Editor (or use the "Insert Headers and Footers" plugin). Paste the widget code snippet into the footer section, just before </body>.
For more WordPress chatbot options, see our WordPress AI chatbot guide.
Shopify#
- In Shopify admin, go to Online Store > Themes
- Click Actions > Edit code (or Customize > Edit code in newer versions)
- Open your theme.liquid file
- Paste the widget code snippet just before the closing </body> tag
- Click Save
The chatbot will appear on every page of your store. To limit it to specific pages, wrap the snippet in a Liquid conditional:
{% if template == 'page' %}
  <!-- paste widget code here -->
{% endif %}
If you sell products online and want AI-powered product recommendations, see our AI chatbot for e-commerce guide.
HTML / Custom Websites#
For any HTML website, paste the widget code directly into your HTML file before </body>:
<!DOCTYPE html>
<html>
<head>
  <title>Your Website</title>
</head>
<body>
  <!-- Your website content -->

  <!-- Chatbot Widget -->
  <script type="module">
    import Chatbot from "https://cdn.jsdelivr.net/npm/@denserai/embed-chat@1/dist/web.min.js";
    Chatbot.init({
      chatbotId: "your_chatbot_id",
    });
  </script>
</body>
</html>
For multi-page sites, add the snippet to every HTML file or include it via a shared footer template.
Wix#
- In the Wix Editor, click Add Elements (+)
- Select Embed Code > Custom Code
- Paste the widget code snippet
- Set the code to load in the Body - End position
- Choose to apply it to All pages
- Click Apply and Publish
Squarespace#
- Go to Settings > Advanced > Code Injection
- Paste the widget code in the Footer section
- Click Save
The code injection method applies the chatbot to every page on your site.
Webflow#
- Go to Project Settings > Custom Code
- Paste the widget code in the Footer Code section
- Click Save Changes and Publish
For page-specific chatbots, use the page-level custom code settings instead of project-wide settings.
React / Next.js#
For React-based applications, load the chatbot script dynamically:
import { useEffect } from 'react';

export default function ChatWidget() {
  useEffect(() => {
    import('https://cdn.jsdelivr.net/npm/@denserai/embed-chat@1/dist/web.min.js')
      .then((module) => {
        module.default.init({ chatbotId: 'your_chatbot_id' });
      });
  }, []);

  return null;
}
Add this component to your root layout to display the chatbot across your entire application.
Testing Your Chatbot Integration#
After adding the code, verify these five things before going live:
- Visibility: Open your website in a browser (use incognito mode to avoid caching). The chat icon should appear in the bottom-right corner.
- Functionality: Click the icon and ask a real customer question. Verify the response is accurate and cites the right source.
- Mobile: Check the chatbot on an actual phone. It should not cover critical content or interfere with scrolling.
- Page speed: Run a PageSpeed Insights test before and after adding the chatbot. A well-built widget should add less than 100ms to your load time.
- Lead capture: If you enabled a contact form, submit a test entry and confirm it appears in your dashboard.
If something does not work, see the troubleshooting section below.
Common Integration Issues and Fixes#
The chatbot does not appear#
- Clear your cache. Browsers cache old versions of your pages. Try incognito mode or clear the cache.
- Check the code placement. The snippet must be inside the <body> tag, not the <head>. Some platforms (Squarespace, Webflow) have separate header and footer code injection areas; use the footer.
- Verify the chatbot ID. Copy the ID directly from your Denser.ai dashboard. A single typo will prevent the widget from loading.
- Check for JavaScript errors. Open your browser's Developer Tools (F12 > Console) and look for red error messages related to the chatbot script.
The chatbot loads but gives wrong answers#
- Re-crawl your website. If you updated your content recently, the chatbot may still reference old pages. Trigger a re-crawl from the dashboard.
- Check your knowledge base. Make sure the pages with the right answers are indexed. Review the document list in your dashboard.
- Adjust the AI prompt. In your chatbot settings, you can add instructions to guide how the AI responds (e.g., "Always recommend contacting support for billing questions").
The chatbot slows down the page#
- Use async loading. The Denser.ai widget loads asynchronously by default, but if you are using a different provider, check that the script has async or defer attributes.
- Lazy-load the widget. Some providers let you delay loading until the user scrolls or clicks. This keeps your initial page load fast.
- Check other scripts. The chatbot may not be the bottleneck. Use Chrome DevTools Network tab to identify which scripts take the longest.
For more details on how chat widgets affect page performance, see DebugBear's benchmark data.
The chatbot does not appear on mobile#
- Check responsive CSS. Some custom CSS overrides can hide elements on small screens. Inspect the chat widget element on mobile to check for display: none or visibility: hidden rules.
- Test on a real device. Browser emulators do not always match real phone behavior. Test on an actual phone.
FAQs About Adding a Chatbot to Your Website#
How do I add a chatbot to my website for free?#
Several platforms offer free plans. Denser.ai provides a free plan with 1 chatbot, 20 queries per month, and up to 100 webpages indexed. You train the chatbot on your content, copy the embed code, and paste it into your site. The entire setup takes under 10 minutes. For more free options, see our free chatbot comparison.
How do I add a chatbot to my website using HTML?#
Paste the chatbot provider's JavaScript snippet before the closing </body> tag in your HTML file. With Denser.ai, the code is a single <script> tag that initializes the widget with your chatbot ID. No other dependencies or libraries are needed.
Does adding a chatbot slow down my website?#
It depends on the provider. Lightweight chatbot widgets add less than 100ms to page load time. Heavier providers can add several seconds. Always load the chatbot script asynchronously and test your page speed before and after installation.
Can I add the same chatbot to multiple websites?#
Yes. Most chatbot platforms let you use the same embed code across multiple domains. With Denser.ai, your chatbot ID works on any site where you paste the widget code.
How do I integrate a chatbot with my CRM?#
Many chatbot platforms connect to CRMs through native integrations or Zapier. Denser.ai integrates with Zapier, Slack, and other tools. When a visitor fills out the contact form in the chatbot, you can automatically push that data to your CRM. See our guide on chatbot integration with CRM for setup details.
What is the difference between a chatbot widget and an iframe embed?#
A widget adds a floating chat button that visitors click to open. An iframe embeds the chatbot as a fixed element within your page layout. Widgets work best for site-wide deployment; iframes work best on dedicated support or FAQ pages. For more on chat widget options, see our comparison guide.