Zapier for Lead Capture
Trigger Zapier workflows upon lead form submission in Denser.ai AI chatbot
The previous guide for Zapier Deployment detailed integrating Denser chat with Zapier workflow. This guide uses a simple example to show how to configure Denser chatbot lead capture to trigger zapier workflow. This example shows how to automatically sync lead data to Google Sheets when a lead is captured.
Prerequisites
- Lead Capture enabled and tested (setup guide).
- A Google Sheet with column headers that match your form fields.
- Your chatbot ID and REST API key.
Lead Capture as Trigger
To create this workflow, start with creating a new zap containing a trigger and an action at zapier.com.
Click the Trigger step, search for DenserAI, and select it as the trigger.
In the App & event tab, select the event When Denser Lead Generation Form Is Filled by a User in DenserAI.
In the Account tab, provide your chatbot ID and the REST Access Key. You can find the chatbot ID on your chatbot dashboard. The REST Access API key can be generated by following the instructions in Chatbot REST API.
In the Test tab, click Find new record. The latest lead generation record submitted to your chatbot will be returned as test data. If you submitted a lead generation form, the additional fields (city, state, and zip) will be in the returned record, labeled as Custom Field Value 0, 1, ... 4. We support up to 5 custom fields in Denser Zapier trigger.
Google Sheets as Action
Search for Google Sheets and select it as the action.
In the App & event tab, select the event Create Spreadsheet Row.
In the Account tab, authenticate to your Google account to grant Zapier access to your Google Sheets account.
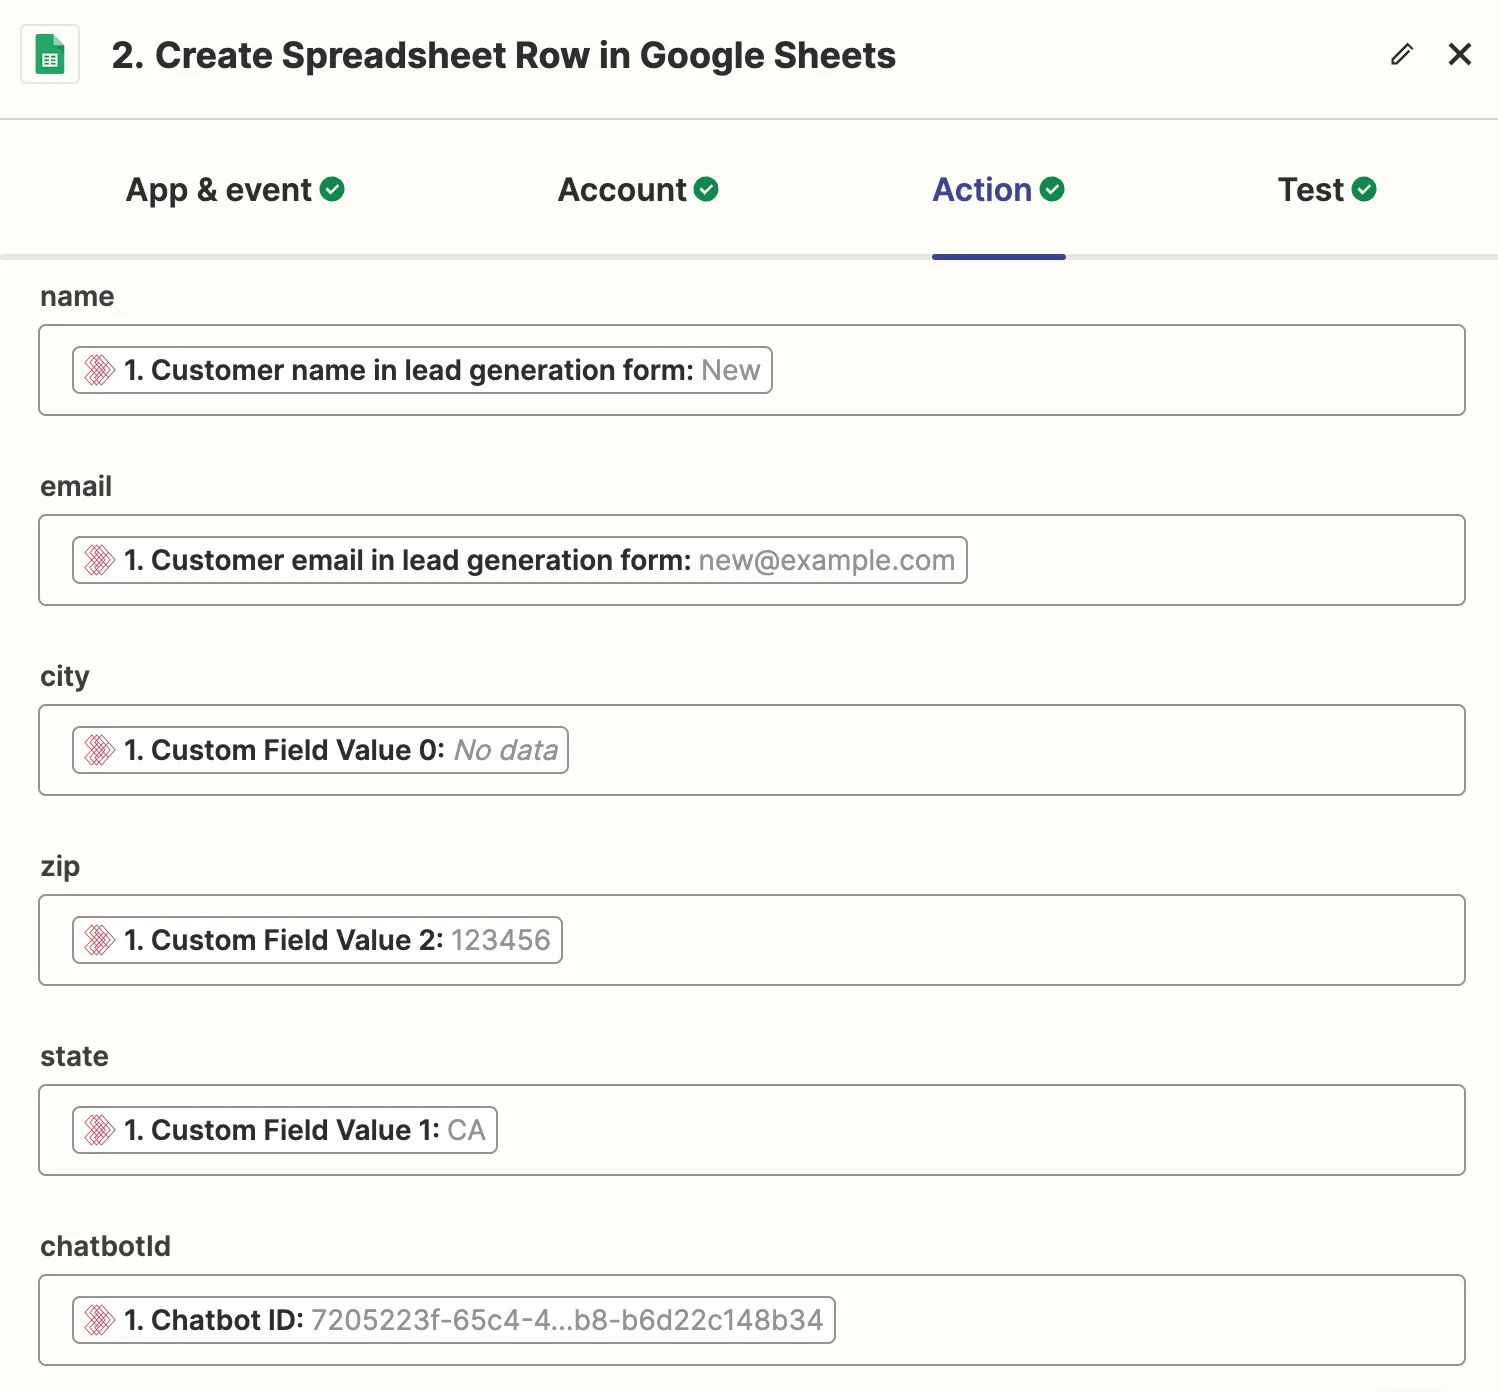
In the Action tab, fill in the fields with the Google worksheet prepared at the previous section. After filling in the fields, press Refresh. The Action tab will display fields matching the columns you created. Map each field to the corresponding output field from the chatbot trigger. Refer to the screenshot below for details.
In the Test tab, click Test step to verify the example chatbot output is added to your Google worksheet.
Publish and Test
Click the Publish button to publish the zap workflow.
Submit a lead form in your chatbot as described in the guide Lead Capture Setup. Each time a lead form is submitted, the data is added as a new row in Google Sheets after a short delay.