Build Your Chatbot App in 10 Minutes

TL;DR#
In this article, you'll learn how to build an AI-powered chatbot application that allows you to customize your own knowledge chatbot for your own data. We'll cover how to:
- build web applications with Next.js,
- integrate AI into software applications with @vercel/ai,
- retrieve your own data with DenserRetriever.
DenserRetriever: An enterprise-grade AI retriever.#
Denser Retriever combines multiple search technologies into a single platform. It utilizes gradient boosting (xgboost) machine learning technique to combine:
- Keyword-based searches that focus on fetching precisely what the query mentions.
- Vector databases that are great for finding a wide range of potentially relevant answers.
- Machine Learning rerankers that fine-tune the results to ensure the most relevant answers top the list.
Now back to the article!
Prerequisites#
To fully understand this tutorial, you need to have a basic understanding of React or Next.js. Here are the tools required to build the AI-powered chatbot application:
- Docker&Docker compose - provides DenserRetriever api server in your local host.
- OpenAI API - provides an API key that enables us to carry out various tasks using ChatGPT models.
Project Set up and Package Installation#
Create Next.js project#
First, create a Next.js application by running the code snippet below in your terminal:
npx create-next-app --example https://github.com/vercel/ai/tree/main/examples/next-langchain next-retriever
For this tutorial, we'll be using the langchain integrated template from vercel. Next, we can install the dependencies.
cd next-retriever
npm install
Start DenserRetriever#
First, copy the docker-compose.yml file to your work directory.
version: "3.5"

services:
  denserretriever:
    image: jotyy318/denserretriever
    healthcheck:
      test: ["CMD", "curl", "-f", "http://localhost:8090/"]
      interval: 30s
      timeout: 20s
      retries: 3
    ports:
      - "8090:8090"

  elasticsearch:
    image: elasticsearch:8.13.4
    environment:
      - discovery.type=single-node
      - ES_JAVA_OPTS=-Xms1g -Xmx1g
      - xpack.security.enabled=false
    volumes:
      - ${DOCKER_VOLUME_DIRECTORY:-./docker-volume}:/usr/elasticsearch/data
    ports:
      - "9200:9200"
      - "9300:9300"

  etcd:
    container_name: milvus-etcd
    image: quay.io/coreos/etcd:v3.5.0
    environment:
      - ETCD_AUTO_COMPACTION_MODE=revision
      - ETCD_AUTO_COMPACTION_RETENTION=1000
      - ETCD_QUOTA_BACKEND_BYTES=4294967296
    volumes:
      - ${DOCKER_VOLUME_DIRECTORY:-./docker-volume}/volumes/etcd:/etcd
    command: etcd -advertise-client-urls=http://127.0.0.1:2379 -listen-client-urls http://0.0.0.0:2379 --data-dir /etcd

  minio:
    container_name: milvus-minio
    image: minio/minio:RELEASE.2020-12-03T00-03-10Z
    environment:
      MINIO_ACCESS_KEY: minioadmin
      MINIO_SECRET_KEY: minioadmin
    volumes:
      - ${DOCKER_VOLUME_DIRECTORY:-./docker-volume}/volumes/minio:/minio_data
    command: minio server /minio_data
    healthcheck:
      test: ["CMD", "curl", "-f", "http://localhost:9000/minio/health/live"]
      interval: 30s
      timeout: 20s
      retries: 3

  standalone:
    container_name: milvus-standalone
    image: milvusdb/milvus:v2.3.15
    command: ["milvus", "run", "standalone"]
    environment:
      ETCD_ENDPOINTS: etcd:2379
      MINIO_ADDRESS: minio:9000
    volumes:
      - ${DOCKER_VOLUME_DIRECTORY:-./docker-volume}/volumes/milvus:/var/lib/milvus
    ports:
      - "19530:19530"
    depends_on:
      - "etcd"
      - "minio"

networks:
  default:
    name: milvus
Next, you can replace the data in /code/data with your own. If not, it will use the default data from DenserAI.
Finally, run the command below to start DenserRetriever.
docker compose up -d
After building index complete, the status of denserretriever will be healthy.
Congratulations! You're now ready to build the application.
Building the chatbot application#
In this section, I'll walk you through building the chatbot application. To set up connection between Next.js and DenserRetriever, navigate to the Next.js app folder /api/chat and edit the file route.ts.
import { ChatOpenAI } from "@langchain/openai";
import { LangChainAdapter, Message, StreamingTextResponse } from "ai";
import { AIMessage, HumanMessage } from "langchain/schema";

export const dynamic = "force-dynamic";
export const maxDuration = 60;

function generatePrompt(query: string, passages: string[]): string {
  let prompt: string =
    "### Instructions:\n" +
    "The following context consists of an ordered list of sources. If you can find answers from the context, use the context to provide a long response. You MUST cite the context titles and source URLs strictly in Markdown format in your response. If you cannot find the answer from the sources, use your knowledge to come up with a reasonable answer and do not cite any sources. If the query asks to summarize the file or uploaded file, provide a summarization based on the provided sources. If the conversation involves casual talk or greetings, rely on your knowledge for an appropriate response.";

  prompt += `### Query:\n${query}\n`;

  if (passages.length > 0) {
    prompt += `\n### Context:\n${JSON.stringify(passages)}\n`;
  }

  prompt += "### Response:";

  return prompt;
}

export async function POST(req: Request) {
  const {
    messages,
  }: {
    messages: Message[];
  } = await req.json();

  const model = new ChatOpenAI(
    {
      model: "gpt-4o",
    },
    {
      baseURL: process.env.OPENAI_API_BASE_URL,
    },
  );

  const query = messages[messages.length - 1].content;

  const { passages } = await fetch("http://127.0.0.1:8090/retrieve", {
    method: "POST",
    headers: {
      "Content-Type": "application/json",
    },
    body: JSON.stringify({
      question: query,
    }),
  })
    .then((res) => {
      if (res.ok) {
        return res.json();
      } else {
        throw new Error("Failed to fetch");
      }
    })
    .catch((err) => {
      return { docs: [], passages: [] };
    });

  const prompt = generatePrompt(query, passages);

  const stream = await model.stream(
    messages.map((message) =>
      message.role == "user"
        ? new HumanMessage(prompt)
        : new AIMessage(message.content),
    ),
  );

  return new StreamingTextResponse(LangChainAdapter.toAIStream(stream));
}
Next, set up your OPENAI_API_KEY environment variable in .env.local.
cp .env.local.example .env.local
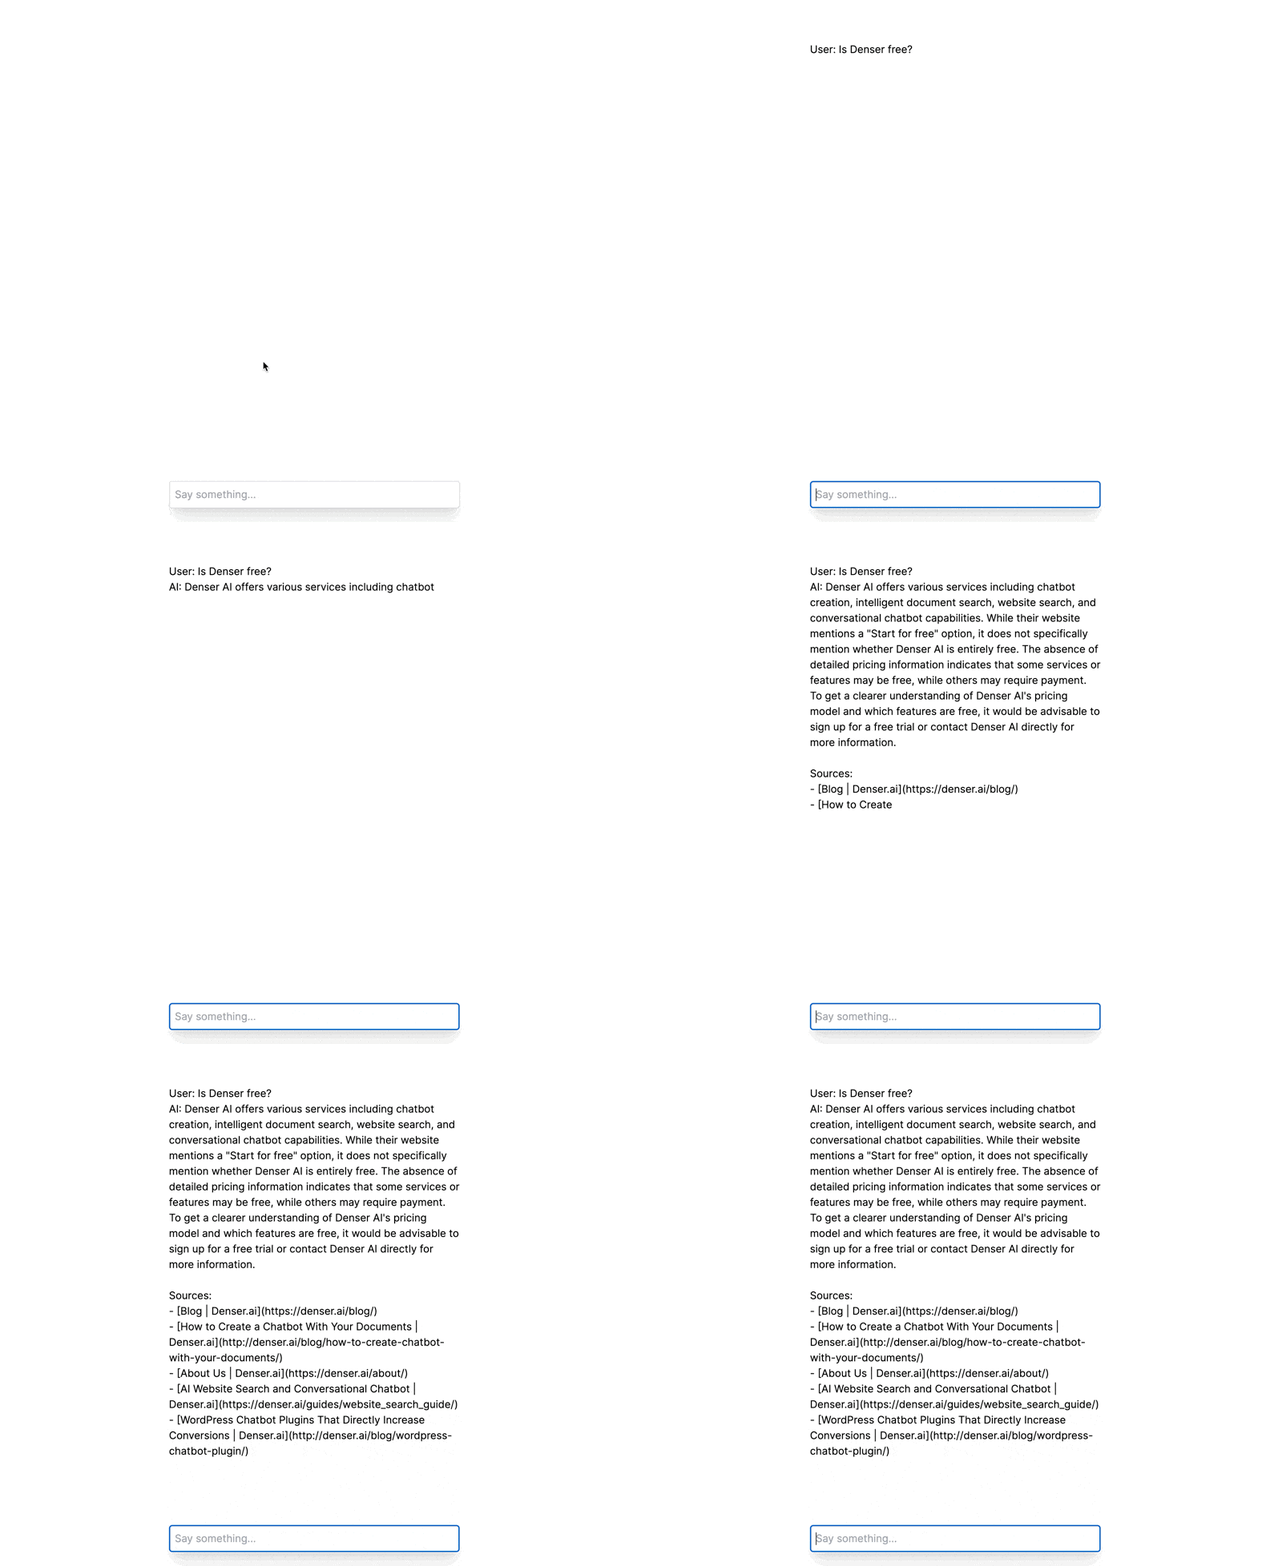
Now, start your Next.js application, you will see the magic.

Conclusion#
This Chatbot application demonstrates how to use DenserRetriever to power an end-to-end application.
If you're building an enterprise AI application, DenserRetriever is a great choice for your data retrieval needs.